


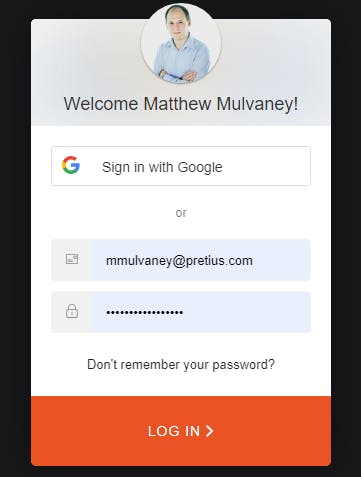
https://pretius.com/blog/using-auth0-organizations-with-oracle-apex/On a Free Auth0 account, you may add up to 2 Social Connections. By adding these connections, new buttons appear. For example by adding Google, a new Sign in with Google button appears
This is great as it allows Google, Microsoft, Apple and more than 60 other supported connections to access your APEX applications.
What's not so great is if you are using the Emulated Organisation method in a SaaS approach (or just picky about who you let in), because it's going to let anyone in with a Social Account and you do not know which organisation to allocate them to or should they even access your application.
In the Organisations method, you do know the organisation, but basically, you want some control over who is accessing your application. i.e. just because they have a Social Account doesn't automatically mean they should be able to access your application.
This blog extends the Emulated Organisation method (which is a prerequisite before commencing) and will give you the following information:
How to Add a Social Connection to your Application
How to default the correct Role based on the Social Account email. For example:
- I'll associate the WATER organisation with emails ending pretius.com. If my Social Account email ends in pretius.com, it will automatically grant me the ORG:WATER role
Control access to my Application. For example
If my Social Account email is not recognised by any Organisation, then access will not be granted.
e.g. If I sign in with my gmail.com account, then I will not be granted access
So how is Auth0 going to talk to my APEX Application? i.e. if a user logs in socially with pretius.com, how is Auth0 going to
i. check if an Organisation exists for this domain and
ii. find the correct Role to attribute to this user.
Well, for this, we are going to create a secured REST Endpoint in our APEX Application and call it through the axios Node.JS library in an Auth0 Action. Don't worry this is quite simple: Node.JS is a part of Auth0 and we'll just include Axios as a dependency.
Prerequisites
Complete the Emulated Organisation method as this blog extends it.
Database Configuration
Add a domain column to your organisation table to represent allowed email domains
 alter table "ORGANISATION" add
 ("DOMAIN" VARCHAR2(255));
 alter table "ORGANISATION" add
 ("ROLE" VARCHAR2(255));
Update the domain column on the Organisation table for records representing the allowed email domain for that organisation e.g
 UPDATE organisation
    SET domain =  CASE secret_id
                 WHEN 'WATER'
                 THEN 'pretius.com' -- Your social domain
                 ELSE NULL
                 END,
        role = 'ORG:' || UPPER(secret_id)
So that it looks like:

REST Configuration
Click on SQL Workshop > RESTful Services
We are going to create a REST Module for Auth0 to fetch the correct Role to use (ROLE) based on the User email (DOMAIN)
Click on SQL Workshop > RESTful Services
Register your schema for ORDS if not already
Click Modules > Create Module
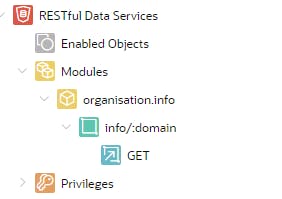
For Module Name enter organisation.info
For Base Path enter
/orginfo/Click Create Module
Click Create Template
In URI Template enter
domain/:secretand then click Create Template
Click Create Handler
In Source Type, select Collection Query Item
In Source type
SELECT *
  FROM organisation
 WHERE domain = :domain
Click Create Handler
It should look like this when you've finished
Click Privileges > Create Privilege
Add both a name and title of organisation.info.priv
In Protected Modules, slide organisation.info to the right
Click Create Privilege
Create a Client by running the below
BEGIN
  OAUTH.create_client(
    p_name            => 'org_client',
    p_grant_type      => 'client_credentials',
    p_owner           => 'Matt Muvlaney',
    p_description     => 'A client for Auth0',
    p_support_email   => 'mmmulvaney@pretius.com',
    p_privilege_names => 'organisation.info.priv'
  );

  COMMIT;
END;
/
Clipboard the Client ID and Secret
SELECT id, name, client_id, client_secret
FROM   user_ords_clients
WHERE name = 'org_client'
Obtain a Google Client ID & Secret
This part is optional if you are just testing. However, its mandatory if you are going to production with Google/Gmail Authentication.
Click here https://marketplace.auth0.com/integrations/google-social-connection
Change to the Installation Tab
Follow the guide to obtain a Google Client ID and Client Secret
Social Connection Configuration
Visit the Auth0 Dashboard
Click Authentication > Social > Create Social Connection
Click Google / Gmail
Click Continue at the consent page
If you have a Google Client ID and Secret (from the above section) enter these on this page
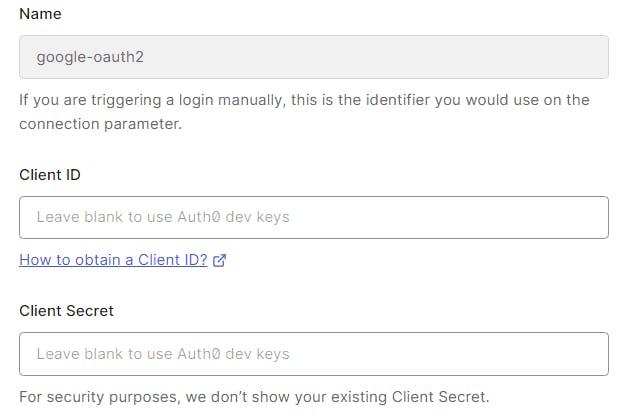
Click Create at the bottom
Activate your APEX Application to use google-oauth2 by using the slider alongside your APEX application

Auth0 Action Configuration
Visit the Auth0 Dashboard
Go to Actions > Library > Custom > Build Custom
Create an Action using the following details

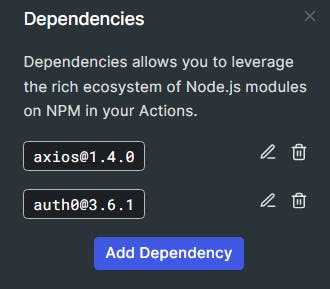
Add auth0 (in lowercase) as a dependency

Click Create
Add another dependency of axios (lowercase) and click Create. You should now have two dependencies which have now been resolved to the latest versions
Add a secret called domain representing your auth0 management domain (not the ORDS one - but your Auth0 Application one. If you've forgotten this just go to Applications > Applications > Your APEX Application) but without the https:// protocol e.g dev-ipga63.uk.auth0.com
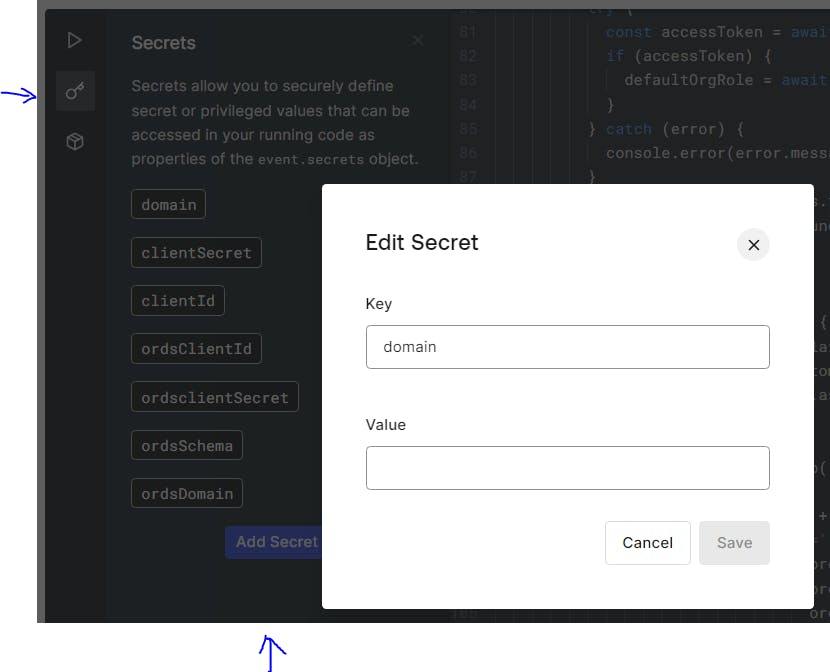
Add the following secrets for the following details
clientId pasting in the Client ID (not the ORDS one - but your Auth0 Application one) e.g. fzggzgt56676zg
clientSecret pasting in the Client's Secret ID (not the ORDS one - but your Auth0 Application one) e.g. fb9z68x7b96c
ordsClientId pasting in the Client ID from the SQL statement you ran above e.g. f76b7c76987cx6586c
ordsClientSecret pasting in the Secret ID from the SQL statement you ran above e.g. aba7ba7ba7bbc6d
ordsSchema Enter is your workspace name as it is aliased in ORDS e.g. wksp_x
ordsDomain This is your ords endpoint without a trailing slash e.g. g4cf-lufatp.adb.eu-frankfurt-1.oracleclouda..
apexApplication This is your APEX application link in this format e.g.
/z-products/home?request=APEX_AUTHENTICATION%3DAUTH0
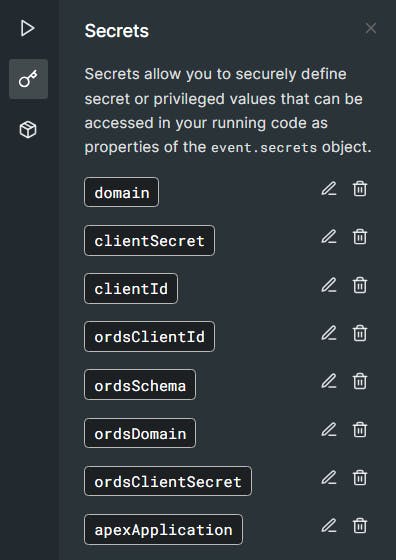
Check you have all these Secrets
In the code section, replace everything with
 exports.onExecutePostLogin = async (event, api) => {
   const namespace = "https://my-app.example.com";
   var defaultOrgRole;
   var emailDomain;
   const ManagementClient = require("auth0").ManagementClient;
   const axios = require('axios');

   const ordsClientId = event.secrets.ordsClientId; // '43243..';
   const ordsClientSecret = event.secrets.ordsClientSecret; // '3432..';
   const ordsSchema = event.secrets.ordsSchema; // 'wksp_x';
   const ordsDomain = event.secrets.ordsDomain; // 'https://g4cf-lufatp.adb.eu-frankfurt-1.oraclecloudapps.com/ords';
   const apexApplication = event.secrets.apexApplication; // '/z-products/home?request=APEX_AUTHENTICATION%3DAUTH0'
   const ordsRouter = '/r/';
   const ordsEndpoint =  ordsDomain + '/' + ordsSchema;

   const mngmntDomain = event.secrets.domain;
   const mngmntClientId = event.secrets.clientId;
   const mngmntClientSecret = event.secrets.clientSecret;
   const mngmntScope = "read:roles create:roles update:roles";

   const applicationRolePrefix = 'ORG';

   const management = new ManagementClient({
     domain: mngmntDomain,
     clientId: mngmntClientId,
     clientSecret: mngmntClientSecret,
     scope: mngmntScope,
   });

   const userRoles = await management.getUserRoles({ id: event.user.user_id });
   const roles = await management.getRoles();

   // Function ORDS get Token
   const getAccessToken = async () => {
     const credentialsBase64 = Buffer.from(`${ordsClientId}:${ordsClientSecret}`).toString('base64');
     const headers = {
       'Authorization': `Basic ${credentialsBase64}`,
       'Content-Type': 'application/x-www-form-urlencoded'
     };

     const data = new URLSearchParams();
     data.append('grant_type', 'client_credentials');

     try {
       const response = await axios.post(`${ordsEndpoint}/oauth/token`, data, { headers });
       return response.data.access_token;
     } catch (error) {
       throw new Error(`Failed to get access token: ${error.message}`);
     }
   };

   // Function ORDS Fetch Organisation Information
   const fetchOrgInfo = async (accessToken) => {
     const headers = {
       'Authorization': `Bearer ${accessToken}`
     };

     try {
       const response = await axios.get(`${ordsEndpoint}/orginfo/info/${emailDomain}`, { headers });
       return response.data.role; // Return the role value
     } catch (error) {
       // Handle Error from caller
     }
   };

   var data = { "users": [event.user.user_id] };

   try {
     if (event.authorization) {
       if (!event.user.email_verified) {
         return;
       } else {
         const hasOrgRole = userRoles.some(role => role.name.startsWith(applicationRolePrefix));

         // No ORG role detected
         if (!hasOrgRole) {

           // Find default role
           emailDomain = event.user.email.match(/@(.+)/)[1].toLowerCase(); // extract the email address
           try {
             const accessToken = await getAccessToken();
             if (accessToken) {
               defaultOrgRole = await fetchOrgInfo(accessToken);
             }
           } catch (error) {
             console.error(error.message);
           }
           const foundRecord = roles.find(record => record.name === defaultOrgRole);
           const defaultRoleId = foundRecord ? foundRecord.id : null;

           if (defaultRoleId) {

             const defaultRoleObj = { id: defaultRoleId };
             api.idToken.setCustomClaim(`${namespace}/roles`, defaultRoleId);
             api.accessToken.setCustomClaim(`${namespace}/roles`, defaultRoleId);
             await management.roles.assignUsers(defaultRoleObj, data);
           } else {
             // Deny Access
             api.redirect.sendUserTo(
               'https://' +
               event.secrets.domain +
               '/v2/logout?returnTo=' +
               encodeURIComponent( ordsDomain +
                                   ordsRouter +
                                   ordsSchema +
                                   apexApplication ) +
               '&client_id=' +
               event.secrets.clientId
             );

           }
         }
       }
     }
   } catch (e) {
     console.log(e);
   }

 };
Tip: If you are debugging NodeJS code then https://replit.com/ is a good editor for this.
Double-check the ordsRouter value in the code. It should be fine.
Click Deploy
Click on Actions > Flows > Login
Click on Custom tab
Drag the Assign Default Role action to the place in the diagram below
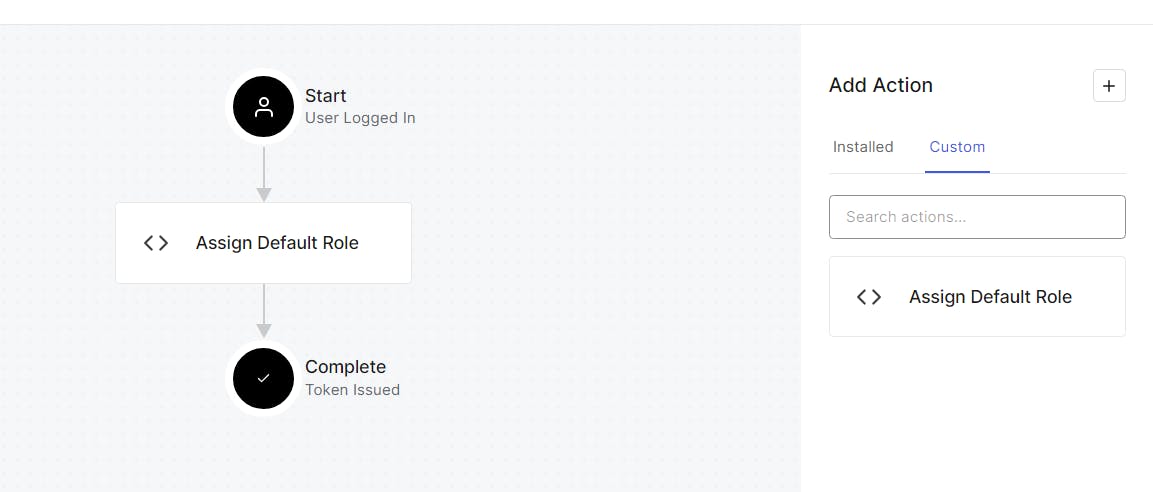
Click Apply
Testing
Run your APEX Application.
On the Sign in Page, Sign in by clicking the Sign in with Google button
You should be logged in to your APEX Application
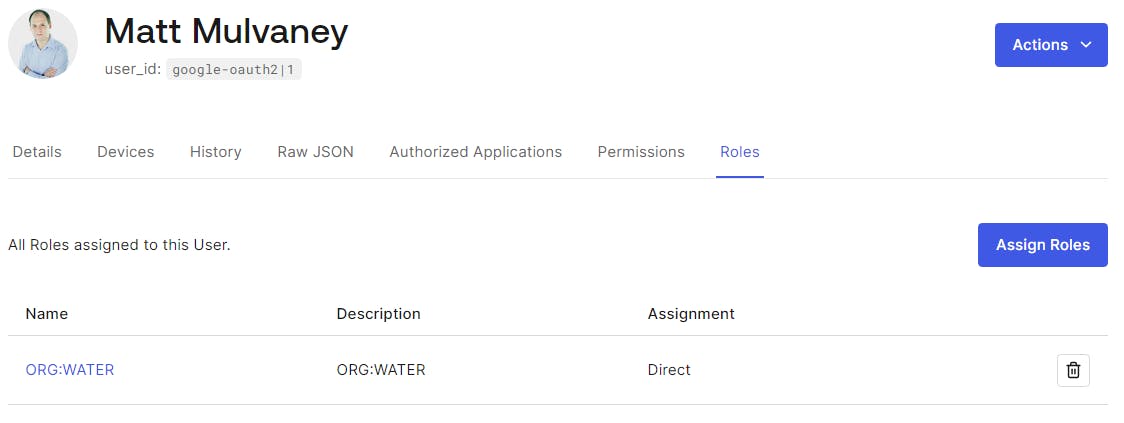
Click User Management > Users and you should see a new user

Click through and visit the Roles tab, the user should have been granted the correct Organisation Role of ORG:WATER
Let's test that only users or a certain domain are let in.
Sign Out of APEX and return to the login screen.
Change the email domain by running this
 UPDATE organisation
    SET domain =  CASE secret_id
                 WHEN 'WATER'
                 THEN 'nintendo.com' -- Your social domain
                 ELSE NULL
                 END,
        role = 'ORG:' || UPPER(secret_id)
Click the Sign in with Google button and you'll be thrown back to the Sign page because pretius.com != nintendo.com 😆
ENJOY!
Retrospect
Whilst is nice being able to use axios to talk to ORDS in an Auth0 action. Perhaps clever construction of a description of the Auth0 Role might work. For example, if I give ORG:WATER a description of
 {
     "domain": "pretius.com"
 }
Then the Management API could be used to fetch the Role Description and then the Auth0 Action could parse out the key value.
If so, no ORDS REST API is required. However, I do feel this ORDS REST API may be handy for other things
I would expect APEX would manage both Role Creation via the Auth0 API and maintenance of the Organisation table - in some kind of Add Organisation Wizard set of pages.
Be aware that the Management API & Auth0 API are two separate things with the former being used within Auth0 Actions. I've hyperlinked both for your reference.
What's the picture? It's sunset over Crimple Valley. Visit Yorkshire!