A few years back I remember reading this blog about how to How To Set Up and Run a (Really Powerful) Free Minecraft Server in the Cloud.
Fast forward a few years and my son gets a PS5 and we find he's unable to join Private Servers as this not a feature for Consoles.
I find various solutions involving paid or ad based phone apps, however the one that works best for us is BedrockConnect.
Basically you attempt to connect to a stock server e.g The Hive and BedrockConnect diverts you to a Private Server management page where you can configure and connect to Private Minecraft Servers
There are a 4 main options to start using it:
Change your Console's DNS settings to the BedrockConnect Servers (Switch, XBOX)
Point your router's DNS settings to BedrockConnect Servers
Point your router's DNS settings to a private Self Hosted BedrockConnect Server
Change your Console's DNS settings to a private Self Hosted BedrockConnect Server
Option 1 sends all console internet DNS requests to the BedrockConnect Servers and you may have privacy concerns about this. Options 2 & 3 do not require you to mess around with your consoles DNS settings, however Option 4 does.
Option 2 is better as it only sends DNS requests to stock Minecraft severs via BedrockConnect Servers, however you are totally dependent on third party server availability.
Option 3 is best as no DNS requests are send to BedrockConnect Servers and the up time is self managed.
For Options 2 & 3, you'll need a DNS server & Pi-Hole is a good option for a this with ad-blocking features and here are two guides to get started
For Option 4, read on, just ignore the Pi-Hole stuff.
Requirements
A DNS server, like Pi-Hole with your router configured to send DNS requests through it - see links above
A Raspberry Pi or Oracle Compute Instance with an IP accessible to your DNS server
If you need an Oracle Compute Box, follow this guide.
Instructions are provided for both Raspberry Pi and Oracle Compute. I provide instructions for both.
These instructions:
Installs/Configures the tools required
Sets up a background task (nohup) to
Stops BedrockConnect at 03:30 daily
Downloads & Starts the latest version of BedrockConnect at 03:31 daily (meaning its always up to date with the latest features)
Instructions
Oracle Compute Only: Follow this guide to open port 19132
Update your Unix Box (may take some time)
 # Raspbery Pi only
 sudo apt update -y
 sudo apt upgrade -y

 # Oracle Cloud
 sudo dnf check-update && sudo dnf upgrade -y
Install Java
 # Raspbery Pi
 sudo apt install openjdk-17-jdk -y

 # Oracle Compute
 sudo dnf install java-17-openjdk -y
Test JAVA is installed
java -verisoninstall jq
 # Raspbery Pi
 sudo apt-get install jq -y

 #  Oracle Compute
 sudo dnf install jq -y
Ensure utilities are installed
 # Raspbery Pi
 sudo apt-get install -y curl wget nano

 #  Oracle Compute
 sudo dnf install -y curl wget nano
Make a custom servers file
echo "[]" > custom_servers.jsonOPTIONAL: If you have custom servers, then add them like this format
 rm custom_servers.json
 nano custom_servers.json
Paste in the following and save
 [
     {
         "name": "My Custom Server 1",
         "iconUrl": "https://i.imgur.com/nhumQVP.png",
         "address": "mc1.example.com",
         "port": 19132
     },
     {
         "name": "My Custom Server 2",
         "iconUrl": "https://i.imgur.com/nhumQVP.png",
         "address": "mc2.example.com",
         "port": 19132
     }
 ]
Create a startBedrockConnect.sh
 cat <<'EOF' > startBedrockConnect.sh
 # Get the latest release tag from GitHub API
 latest_release=$(curl -s https://api.github.com/repos/Pugmatt/BedrockConnect/releases/latest | jq -r '.tag_name')

 # Construct the URL for the latest release
 download_url="https://github.com/Pugmatt/BedrockConnect/releases/download/$latest_release/BedrockConnect-1.0-SNAPSHOT.jar"

 echo "Latest Release $latest_release"
 echo "$download_url"
 echo "Downloading at $(date)"

 # Download the latest release
 wget -q $download_url -O BedrockConnect-1.0-SNAPSHOT.jar

 echo "Download complete at $(date)"

 # Start Bedrock Connect
 java -jar BedrockConnect-1.0-SNAPSHOT.jar nodb=true custom_servers="custom_servers.json"

 EOF
Create a stopBedrockConnect.sh
cat <<'EOF' > stopBedrockConnect.sh
sudo kill -9 $(sudo netstat -tulnp | grep :19132 | awk '{print $NF}' | cut -d'/' -f1)
EOF
Make them executable
chmod +x startBedrockConnect.sh
chmod +x stopBedrockConnect.sh
Make a BedrockConnectLogs folder
mkdir BedrockConnectLogsSchedule these scripts to run daily
export EDITOR=nano; crontab -eAdd these 2 lines to the end of the file this kills the job at 03:30 and then starts it again at 03:31
30 3 * * * cd /home/admin && ./stopBedrockConnect.sh
31 3 * * * cd /home/admin && nohup ./startBedrockConnect.sh >> $(pwd)/BedrockConnectLogs/bedrockconnect_$(date +\%Y-\%m).log 2>&1 &
IMPORTANT: Before saving, change this part in the above 2 lines
/home/adminto your current location which you can obtain by typing
pwdCTRL+X to save the file and exit nano
Start BedrockConnect nohup service to run in the background
cd /home/admin && nohup ./startBedrockConnect.sh >> $(pwd)/BedrockConnectLogs/bedrockconnect_$(date +\%Y-\%m).log 2>&1 &View the Log
tail -f $(pwd)/BedrockConnectLogs/bedrockconnect_$(date +%Y-%m).logWhen it shows this - you are good to go
Bedrock Connection Started: 0.0.0.0:19132OPTIONAL: If you need to kill it, use this
./stopBedrockConnect.shYou should already know this , but discover your local IP (this might help) of your Unix Box
hostname -IAdd that IP to your DNS Server (3rd column)
| Server | Domain | IP | | --- | --- | --- | | The Hive | geo.hivebedrock.network | | | The Hive | hivebedrock.network | | | Mineville | play.inpvp.net | | | Lifeboat | mco.lbsg.net | | | Galaxite | play.galaxite.net | | | Enchanted Dragons | play.enchanted.gg | | | Cubecraft | mco.cubecraft.net | |
I use Pi-hole, so mine looks like this under Local DNS > DNS Records

You probably have done this next step when you set up pi-hole, but configure your router to point at the pi-hole DNS

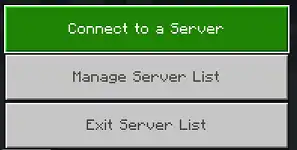
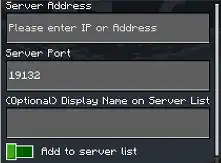
On your console, try to play Enchanted Dragons or other stock server. You'll then see the server list...

...and a management list

If you followed these instructions for...
... Raspberry Pi: Enjoy your own private Bedrock Connect
... Oracle Cloud: Enjoy your public server. Share the IP with your friends 😊
ENJOY
Troubleshooting
if you see this java.net.BindException: Address already in use try this:
Find the PID
sudo netstat -tulnp | grep :19132This returns the PID (e.g 32453 in my case)
udp6 0 0 :::19132 :::* 32453/javaKill it
kill 32453
Finally
Whats the picture? It's Plumpton Rocks where Turner visited to paint them circa 1798

