


Custom Domain for your Oracle 23c Free APEX & ORDS all in one Docker Container with Nginx Proxy Manager


Apologies for the enormous Blog Title. As you might've guessed, this guide gives you a custom domain for the docker container you built using my Oracle 23c Free Docker, APEX & ORDS all-in-one guide.
My domains are on Cloudflare, so if your domains are not registered there, then you'll have to find the Origin Certificates elsewhere or try self-signed certificates.
Prerequisites
Note in my case, these two are installed on two different compute boxes. Remember, you can have 2 always free compute boxes on your cloud tenancy.
Both boxes are on the same Virtual Network (however this is the default).
Install Nginx Proxy Manager following my guide including the steps about saving the key.pem and cert.pem and loading these into the Nginx Proxy Manager SSL Certificates settings
Install your Oracle 23c Free Docker, APEX & ORDS all in one using my guide
Get a (Sub) Domain and Certificates
You may already have your origin certificates, however, you can always create them again specifically for ORDS.
Log in to Cloudflare Dashboard
Set an A record for your domain name (do not include www.) e.g. example.com or in my case, I'm using a subdomain lufpod.example.com.
Note: The IP address points to your Nginx Box (not your 23cfree box)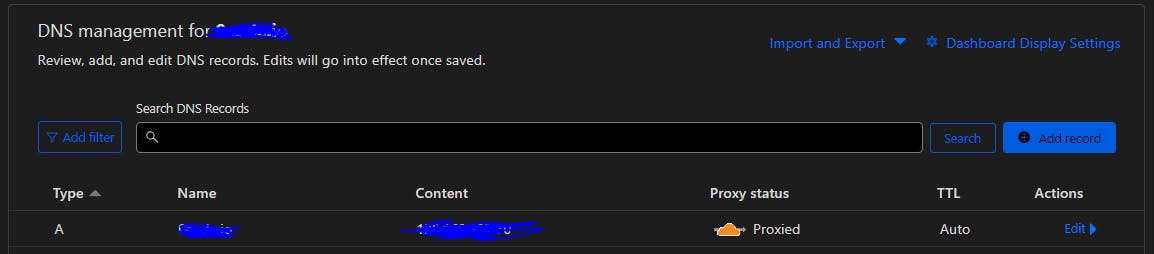
Ensure the Proxy Status is orange/Proxied (see picture above)
In SSL/TLS Ensure that the SSL/TLS encryption mode is Full

Click SSL/TLS > Origin Server > Create Certificate
Ensure it is valid for 15 years and click Create

Keep the browser open, we'll use this later.
Configure ORDS
Now we enter bash into 23cfree compute box
docker exec -it 23cfree /bin/bashDrop into Super User
suStop ORDS using the shell script we created when we set up ORDS.
sh /home/oracle/scripts/stop_ords.shCreate/Enter a folder for keys (Credits to Oracle Base)
 mkdir ~/keystore
 cd ~/keystore
Create a variable to hold your domain, replacing example.com with the domain name you set up (if using a sub-domain, just type the domain name ... not the sub-domain)
export MYDOMAIN='example.com'Create an Origin Certificate Pem file
nano $MYDOMAIN-cert.pemPaste in the Certificate (first box) from Cloudflare
CTRL+X to save and exit
Create a Private Key PEM file
nano $MYDOMAIN-key.pemPaste in the Private Key (second box) from Cloudflare
CTRL+X to save and exit
Convert them to DER format using the below (Credits to Oracle Base)
openssl pkcs8 -topk8 -inform PEM -outform DER -in $MYDOMAIN-key.pem -out $MYDOMAIN-key.der -nocrypt
openssl x509 -inform PEM -outform DER -in $MYDOMAIN-cert.pem -out $MYDOMAIN.der
Modify the ORDS settings from the command line
ords --config /etc/ords/config config set standalone.https.port 8443
ords --config /etc/ords/config config set standalone.https.cert ~/keystore/$MYDOMAIN.der
ords --config /etc/ords/config config set standalone.https.cert.key ~/keystore/$MYDOMAIN-key.der
(Optional) Disable the Landing page in ORDS and go straight to APEX - see here for more information
ords --config /etc/ords/config config set misc.defaultPage apexStart ORDS
sh /home/oracle/scripts/start_ords.sh
Configure Nginx Proxy Manager
If you've not already set it up, follow this guide.
Click on Proxy Hosts
Click on Add Proxy Host
Complete the setup like this:
Change the domain name to your (sub) domain
Change the Forward Hostname / IP to the name of the compute box which 23cfree lives on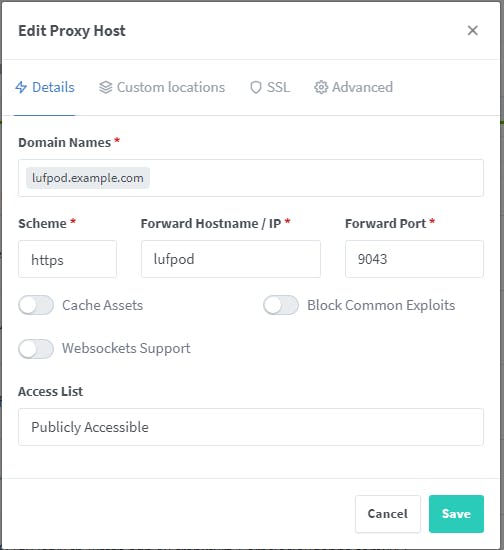
In Custom Locations, set up like this, again changing the Forward Hostname / IP to the name of the compute box which 23cfree lives on

In the /ords/ section click the ⚙️icon and paste in the following
   proxy_set_header Origin "";
   proxy_redirect off;
   proxy_set_header Host $http_host:$port;
   proxy_set_header X-Real-IP $remote_addr;
   proxy_set_header X-Forwarded-For $proxy_add_x_forwarded_for;
   proxy_set_header X-Forwarded-Proto $scheme;
   proxy_connect_timeout 600;
   proxy_send_timeout 600;
   proxy_read_timeout 600;
   send_timeout 600;
In the /i/ section click the ⚙️icon and paste in the following
   proxy_set_header X-Forwarded-Host $host;
   proxy_set_header X-Real-IP $remote_addr;
   proxy_set_header X-Forwarded-For $proxy_add_x_forwarded_for;
Switch to SSL and select your SSL Certificate (You would've created this SSL Certificate when you followed the Nginx Proxy Manager guide)
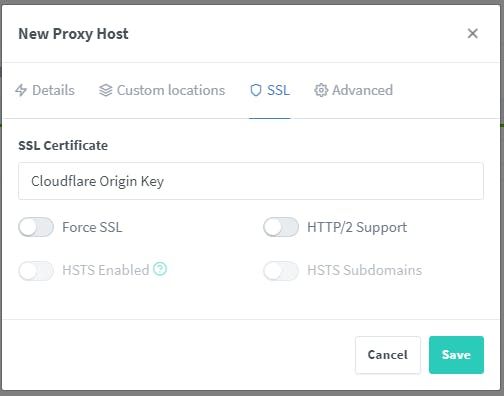
Click Save
Testing
Open a new browser tab for your new (sub) domain and log in to APEX

Click the About Oracle APEX using the circled ❔ help icon

Check that the SERVER_PORT is 443 and the REQUEST_PROTOCOL is https
Enjoy!
What's the picture? It is what's left of Knaresborough Castle during Remembrance. Visit Yorkshire!