


Whilst the demonstration is similar to Philipp's Progress Bar Template Component blog, I want to use this blog to focus on the thought process involved in the creation of a Template Component.
To emphasize this I've selected a Progress Bar that is on 3 lines of HTML so I can have more time mostly writing about the decisions involved in the process.
Let's start
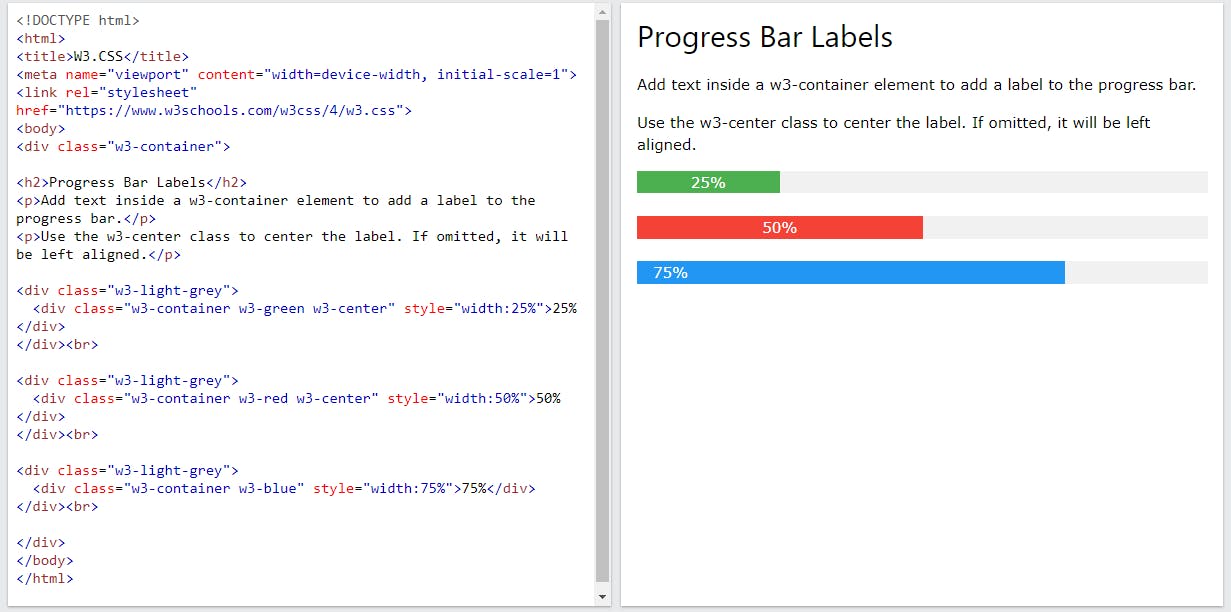
First. find a UI component that you'd think would be good for APEX. For example, the W3Schools Progress Bar see picture here
The key things I'm seeing here are
It looks pretty simple, a couple of <DIV>s to produce a progress bar
The classes, specifically the ones that start with w3 are contained in a single CSS file which is imported into the page.
I don't think I like that <BR> in there 🙂
It's showing multiple progress bars because the HTML is just repeated with different classes and values
The last point is important to how APEX developers should implement this new template component. I have to ask myself some questions
Should I allow developers to have a single...
...Progress Bar in an Interactive Report column?
....region that shows a single Progress Bar?
If the answer to any of the above bullet points is Yes, then your Template Component is a SINGLE
Regardless of how you answered the above, move on to the next question.
Should I allow developers to create a Region that shows multiple Progress Bars?
If the answer is Yes, then your Template Component is (also) a MULTIPLE
In regards to the W3Schools Progress Bar, my thoughts are: I think it would look
quite nice in an Interactive Report Column. I also think it would look quite nice to show multiple Progress bars in a Region.... Therefore my Template Component is both a SINGLE and a MULTIPLE. Let's get to work.In APEX go to Shared Components > Plug-ins > Create > From Scratch > Next
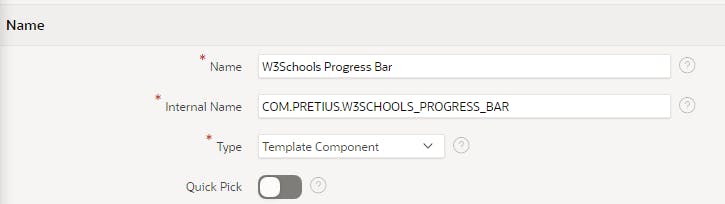
Chose a Name and an Internal Name (like a backward URL)
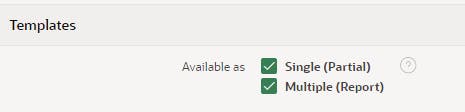
Next tick both the SINGLE and MULTIPLE because we decided that beforehand
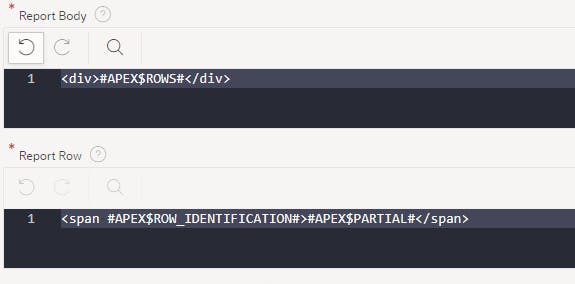
This shows 3 HTML boxes REPORT BODY, REPORT ROW and PARTIAL
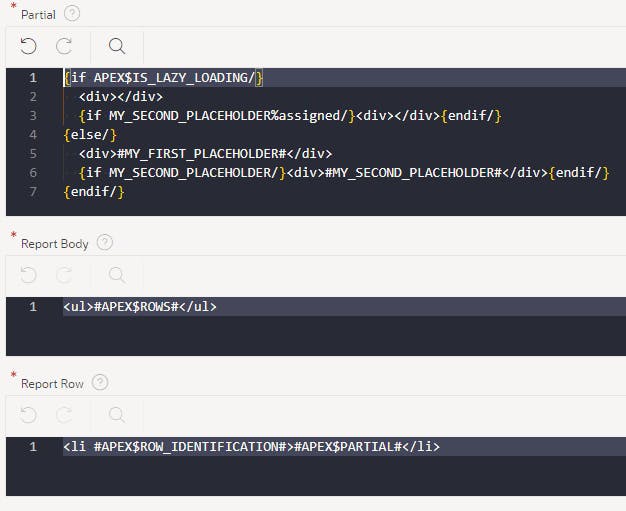
Notice I listed them in a different order than the order that's displayed? That's because I truly believe APEX is listing them in the wrong order.
I know this because it first evaluates the REPORT BODY, then as you can see by #APEX$ROWS#, it evaluates the REPORT ROW. Then as you can see by #APEX$PARTIAL#, it evaluates the PARTIAL
Now, do you see how APEX displays it in the wrong order?
Through this understanding, we determine that our Progress Bar resides within the Report Row's <LI>, which happens to be our PARTIAL... so the PARTIAL is where we are going to embed the code
What I do next is to remove lines 3, 5 & 6 of the PARTIAL - Its just placeholder text and I do this without thinking twice about it.
Now I insert my HTML between the {else/} and {endif/} commands - which are coincidentally, Template Directives. Feel free to read about these in the Universal Theme Application.
{if APEX$IS_LAZY_LOADING/}
  <div></div>
{else/}
  <div class="w3-light-grey">
    <div class="w3-container w3-green w3-center" style="width:25%">25%</div>
  </div>
{endif/}
But before we save, we can do better, by adding some placeholders for the colours and percentages.
{if APEX$IS_LAZY_LOADING/}
  <div></div>
{else/}
  <div class="w3-light-grey">
    <div class="w3-container w3-#COLOUR# w3-center" style="width:#PERCENT#%">#PERCENT#%</div>
  </div>
{endif/}
Once you change the above go ahead and click Create Plug-in
The page reloads, scroll down a bit and you see that Custom Attributes have been lifted out of the PARTIAL and created as part of the plugin.

Let's not forget about the CSS... click Files > Create File
Create a file called progress-bar.css and add the following and Save
@import url("https://www.w3schools.com/w3css/4/w3.css")Note: For speed, this is directly lifted from the W3Shools demo. Read the end of this article for alternatives
Click on W3Schools Progress Bar in the Breadcrumb to return

Scroll down to the files section and our CSS has been saved and minified.
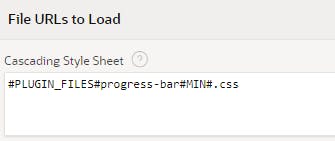
Our CSS won't be loaded unless we tell the plug-in to load it. Therefore, Copy the Reference of the Minified file to clipboard
#PLUGIN_FILES#progress-bar#MIN#.css... and paste it in the File URLs to Load > Cascading Style Sheets section
We are now done with the Template Component, let's go to Page Designer and try it out as a MULTIPLE
Create a Region named Progress Bar with a Type of W3Schools Progress Bar.
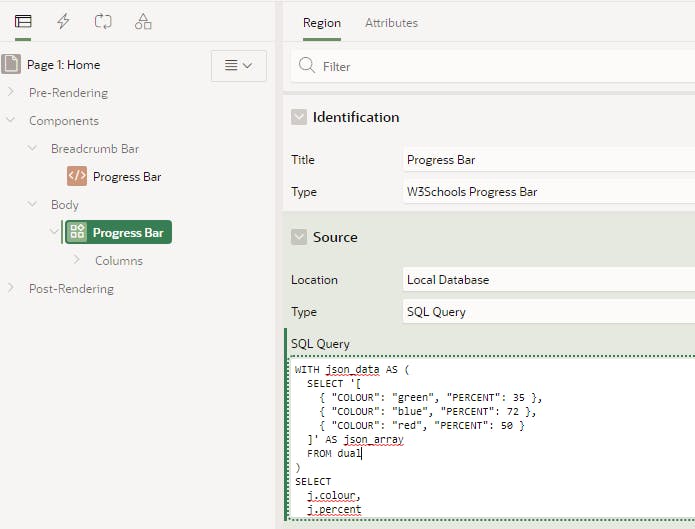
For the SQL Source use this (ignore the JSON, I'm just using it for convenience).
Actually don't ignore it... here is a tip for you, if you want some generated data like this... first ask ChatGPT to provide it in a JSON array, then ask it to give you an Oracle SQL statement to select all rows from it. BINGO - super fast data generation!
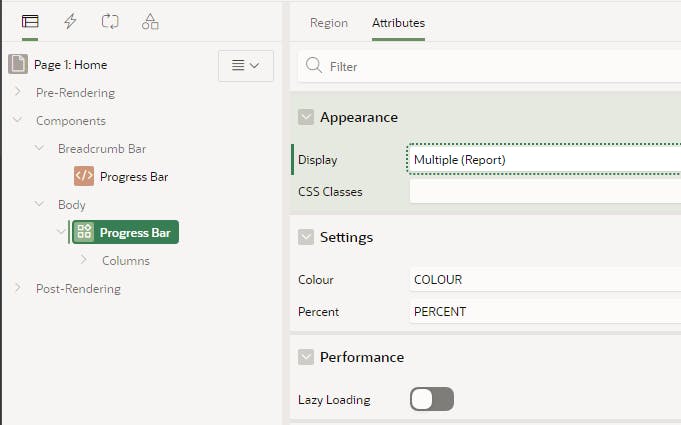
WITH json_data AS (
  SELECT '[
    { "COLOUR": "green", "PERCENT": 35 },
    { "COLOUR": "blue", "PERCENT": 72 },
    { "COLOUR": "red", "PERCENT": 50 }
  ]' AS json_array
  FROM dual
)
SELECT
  j.colour,
  j.percent
FROM
  json_data jd,
  JSON_TABLE(jd.json_array, '$[*]'
    COLUMNS (
      colour VARCHAR2(10) PATH '$.COLOUR',
      percent NUMBER PATH '$.PERCENT'
    )
  ) j
Switch to Attributes and assign the Columns to the Placeholders like this
Run the Page and...

Well, it looks ok, but we have to edit the Plug-In again to remove those bullet points. What I usually do is change the <UL> to a <DIV> and <LI> to a <SPAN> like this.
Run again and it's looking a bit condensed, we can sort this out with the APEX Layout Class margin-bottom-sm

Edit the plugin again and add the Class to the PARTIAL and give it a run
{if APEX$IS_LAZY_LOADING/}
  <div></div>
{else/}
  <div class="w3-light-grey margin-bottom-sm">
    <div class="w3-container w3-#COLOUR# w3-center" style="width:#PERCENT#%">#PERCENT#%</div>
  </div>
{endif/}
Now we are cooking

What's important here is that by using an APEX Class, we are starting to adapt the UI Component to APEX. The more APEX classes you use, the more aligned to the Universal Theme it's becoming.
Now let's see it as a SINGLE in an Interactive Report
Create an Interactive Report on the following SQL
WITH json_data AS (
  SELECT '[
    { "COLOUR": "green", "PERCENT": 35 },
    { "COLOUR": "blue", "PERCENT": 72 },
    { "COLOUR": "red", "PERCENT": 50 }
  ]' AS json_array
  FROM dual
)
SELECT
  j.colour || ' ' || j.percent ||'%' Description,
  j.colour,
  j.percent,
  NULL progress_bar
FROM
  json_data jd,
  JSON_TABLE(jd.json_array, '$[*]'
    COLUMNS (
      colour VARCHAR2(10) PATH '$.COLOUR',
      percent NUMBER PATH '$.PERCENT'
    )
  ) j
This is the same SQL with new DESCRIPTION and PROGRESS_BAR columns
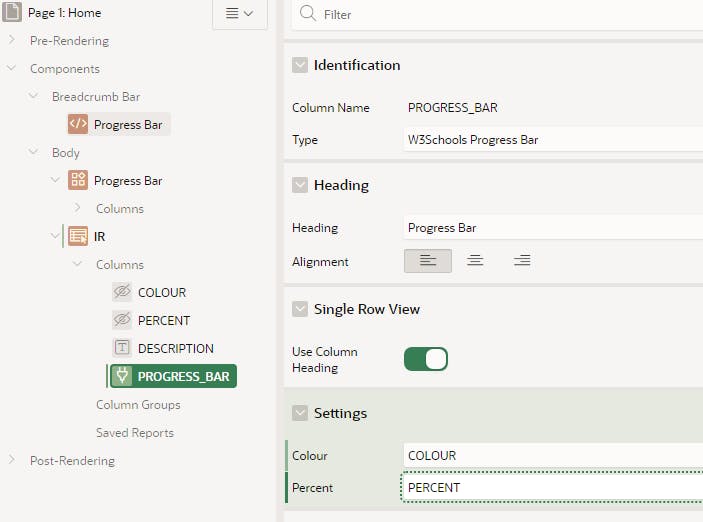
Set COLOUR and PERCENT to be of Type Hidden Column
Set PROGRESS BAR to be
Type: W3Schools Progress Bar
Colour: COLOUR
Percent: PERCENT
Run the page and...
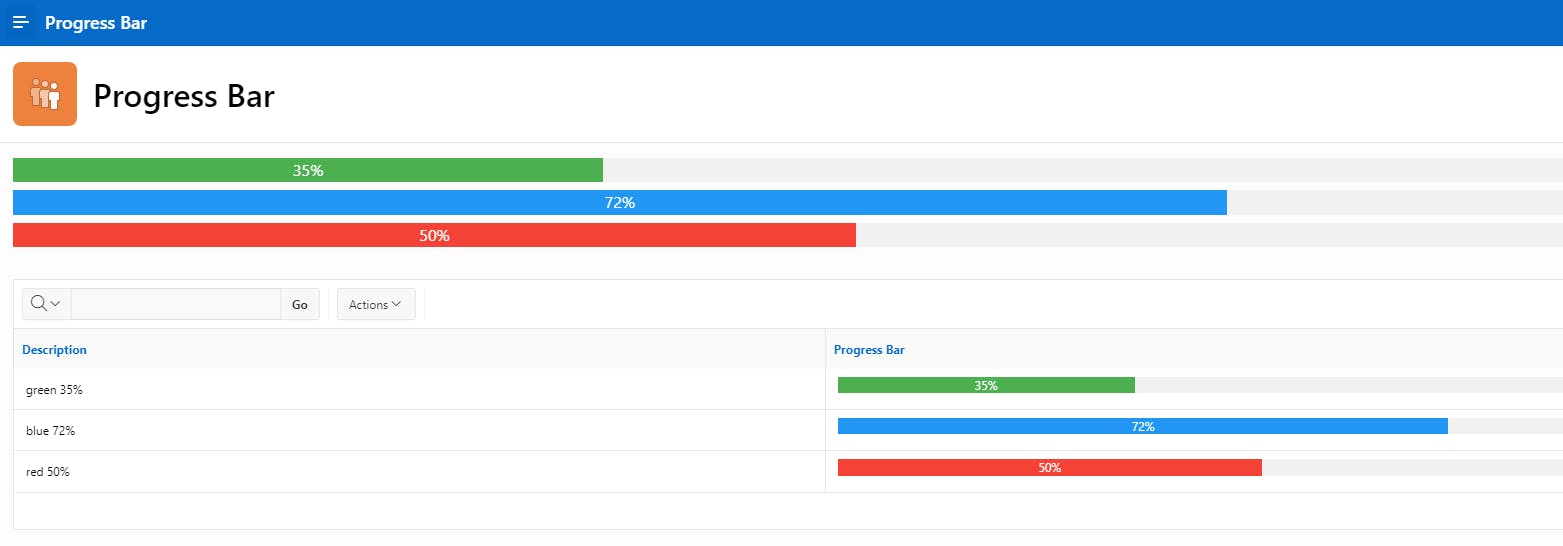
... its great when things work the first time
Retrospect
It was important to describe the thought process in both
The adaptation of a UI Component, which is not APEX aware, to something that now natively slots into the Universal Theme.
SINGLE versus MULTIPLE
Whilst this was achieved in about 30 steps, it's incredibly simple and built in the quickest way possible.
Given another 30 steps, I would...
Use more APEX color classes to not limit it to three, but use Theme Colors instead, or allow developers to specify a HEX color code
Use my own CSS file rather than linking to a third-party site. This is just asking for trouble
Ensure any supplied CSS classes do not clash with APEX classes or those of my application. In the above example, I think classes starting with w3 are somewhat safe.
A bunch of testing. i.e. what happens when I have percentages of -35, 3.14, 741... how will these even render?
Thoroughly test it in Lazy Loading mode. Luckily this one works fine, but I've had issues with this on others.
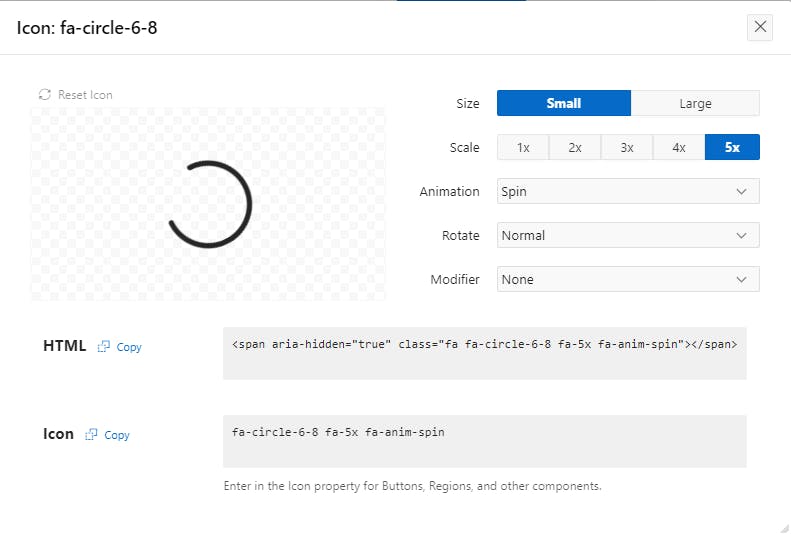
Add a spinner for Lazy Loading. Tip for you, in the Universal Theme application, go to Icons, find one of the circle-x-8 icons, then add a 5x and Spin Animation, and you have your Lazy Loading spinner right there in the HTML section!
Add lots of help text to both the Plug-in & Placeholders
Add an Identification class to the Div in the Report Body
Add an About URL and Version Number
Check if works in other themes (APEX color variables work great here)
Publishing
The apex.world site is great for sharing Template Components. You just need to
Upload your work to a GitHub Repository with a set of files similar to my Cards List UI Template Component
Make a Release on GitHub
Create an apexplugin.json using my example
Thoroughly explain how to use your Template Component in the README.md file. Tip: Use the Markdown Preview feature in VSCode
in apex.world sign in to your account, click Plug-ins, Click Add Plug-in
Paste in your GitHub Project URL and Click Add Plug-in
Final Thoughts
I also create APEX Plugins, and Template Components, for sure are way easier to build and a whole lot of fun. I hope you now feel inspired in some way to create and share your own Template Component Plugins.
What's the picture? It's one-arch, Harrogate, 5 am. Visit Yorkshire