

Self-Host Matomo Analytics on Oracle Compute & integrate with APEX

With around 20 years on the job, Matt is one of the most experienced software developers at Pretius. He likes meeting new people, traveling to conferences, and working on different projects.
He’s also a big sports fan (regularly watches Leeds United, Formula 1, and boxing), and not just as a spectator – he often starts his days on a mountain bike, to tune his mind.
Right, so you're reading this Matomo Blog on Hashnode - and Hashnode has native Matomo Integration. So once complete, we can just hook it up, right? Wrong - The Hashnode Integration is for hosted-only solutions.
Hashnode told me yesterday that: "self hosted matomo isn't supported at the moment. However, we're working on a blog starter kit that'd enable you to host and have more control over your blog."
Sounds interesting. However, if you want to hook Matomo to Hashnode right now, there's a 21-day free Matomo cloud trial - so go ahead and sign up if you want to. If you want to apply self-hosted Matomo to non-Hashnode sites - for example, Oracle APEX, I include a guide to integrating with Oracle APEX at the end of this blog.
Hope you find this interesting.
Prerequisites.
Docker/Podman installed in your compute
We'll need two Docker Containers talking to each other. This needs the dnsname CNI plugin configured correctly. If you are not sure what this is, or not sure if you have already got it, follow this blog first as it starts first by checking it before creating it.
Steps
Pull Matomo
docker pull bitnami/matomoSelect the docker.io image, use down arrow and enter
docker.io/bitnami/matomo:latestCreate a new network for the application and the database:
docker network create matomo_networkCreate a volume for MariaDB persistence
docker volume create mariadb_datacreate a MariaDB container (select the docker.io image again)
 docker run -d --name mariadb \
   -e ALLOW_EMPTY_PASSWORD=yes \
   -e MARIADB_USER=bn_matomo \
   -e MARIADB_DATABASE=bitnami_matomo \
   --net matomo_network \
   --volume mariadb_data:/bitnami \
   bitnami/mariadb:latest
Create volumes for Matomo persistence
docker volume create matomo_datalaunch the container
 docker run -d --name matomo -p 8080:8080 -p 8443:8443 \
   -e ALLOW_EMPTY_PASSWORD=yes \
   -e MATOMO_DATABASE_USER=bn_matomo \
   -e MATOMO_DATABASE_NAME=bitnami_matomo \
   --net matomo_network \
   --volume matomo_data:/bitnami \
    -e MATOMO_PROXY_CLIENT_HEADER=HTTP_X_FORWARDED_FOR \
    -e MATOMO_ENABLE_FORCE_SSL=yes \
    -e MATOMO_ENABLE_ASSUME_SECURE_PROTOCOL=yes \
   bitnami/matomo:latest
Open ports on the firewall
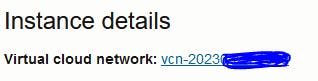
 YOURPORT=8080
 PERM="--permanent"
 SERV="$PERM --service=http"

 sudo firewall-cmd $PERM --new-service=http_matomo
 sudo firewall-cmd $SERV --set-short="http ports"
 sudo firewall-cmd $SERV --set-description="http port exceptions"
 sudo firewall-cmd $SERV --add-port=$YOURPORT/tcp
 sudo firewall-cmd $PERM --add-service=http_matomo
 sudo firewall-cmd --zone=public --add-service=http_matomo--permanent

 YOURPORT=8443
 PERM="--permanent"
 SERV="$PERM --service=https"

 sudo firewall-cmd $PERM --new-service=https_matomo
 sudo firewall-cmd $SERV --set-short="https ports"
 sudo firewall-cmd $SERV --set-description="https port exceptions"
 sudo firewall-cmd $SERV --add-port=$YOURPORT/tcp
 sudo firewall-cmd $PERM --add-service=https_matomo
 sudo firewall-cmd --zone=public --add-service=https_matomo --permanent

 sudo firewall-cmd --permanent --zone=public --add-service=http
 sudo firewall-cmd --permanent --zone=public --add-service=https

 sudo firewall-cmd --reload
In your Compute Instance, Right-click the VCN hyperlink and open the link in a new tab
Click on Security Lists
Click on Default Security List
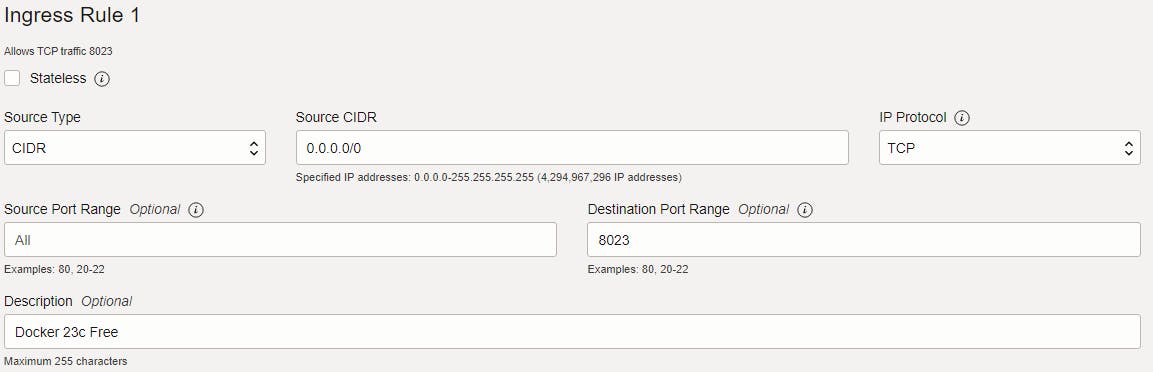
Click Add Ingress Rule for a CIDR of 0.0.0.0/0 and a port of 80. See picture below.
Click Add Ingress Rule at the bottom
Repeat the steps for port 443
Enable linger. This is so that contains continue to run even after the remote session is closed.
loginctl enable-linger $UID(Optional) In your custom domain hosting, create a Matomo sub-domain to your compute IP address

(Optional) set up a Caddy Server with this Caddyfile, changing the domain to your domain
  matomo.example.io {
         reverse_proxy localhost:8080
 }
Sign in with your IP and port 8080 e.g.
http://1.2.3.4:8080or if you have followed the optional steps, use your subdomain (without a port)
The username is: User
The password is: bitnamiImmediately change your password
Go to Settings > Website > Manage > Add New Measurable > Website
Add a new website
Find the Tracking code, it'll look like this
<!-- Matomo -->
<script>
  var _paq = window._paq = window._paq || [];
  /* tracker methods like "setCustomDimension" should be called before "trackPageView" */
  _paq.push(['trackPageView']);
  _paq.push(['enableLinkTracking']);
  (function() {
    var u="//matomo.example.com/";
    _paq.push(['setTrackerUrl', u+'matomo.php']);
    _paq.push(['setSiteId', '123']);
    var d=document, g=d.createElement('script'), s=d.getElementsByTagName('script')[0];
    g.async=true; g.src=u+'matomo.js'; s.parentNode.insertBefore(g,s);
  })();
</script>
<!-- End Matomo Code -->
Apply to APEX
If you want to implement this in APEX
Take the code above, just copy between (but do not include) the
<script>tagsCreate a new matamo.js static application file & paste in the code from the step above and save
Go to Shared Components > User Interface > JavaScript Files and paste in the below
#APP_FILES#matomo#MIN#.jsEnjoy. Each visit of your APEX application will be logged in Matomo. When testing, ensure your ad-blocker is disabled.
What's the picture? it's the Ullswater Steamer. Visit Cumbria! and Yorkshire too.


