

Create Jenkins on Oracle Cloud Compute OL8

With around 20 years on the job, Matt is one of the most experienced software developers at Pretius. He likes meeting new people, traveling to conferences, and working on different projects.
He’s also a big sports fan (regularly watches Leeds United, Formula 1, and boxing), and not just as a spectator – he often starts his days on a mountain bike, to tune his mind.
Follow the installation steps to configure your own Jenkins on Oracle Cloud Compute always FREE shape
Create a compute instance using either
VM.Standard.E2.1.Micro - if you do not intend to run CI/CD with 23c Free, since this shape does not provide sufficient resources to mount the DB.
or
If you are following my APEX CI/CD guide, your choice of...
a. (Recommended) VM.Standard.E2.1 shape, provides more memory over the VM.Standard.E2.1.Micro and get run 23c Free, however, it is not an always-free instance.
b. As Mohamad Subhi Bouchi suggests, a more expensive VM.Standard.E3.Flex with 15GB memory & 1 Gbps bandwidth.
Download the Private & Public Keys
Create the compute instance which will take about 5 mins to create
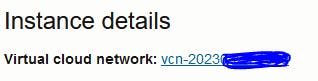
Once provisioned, Right-click the VCN hyperlink and open the link in a new tab
Click on Security Lists
Click on Default Security List
Click Add Ingress Rule using the following details

Click Add Ingress Rule at the bottom
Close the Browser Tab & Return to the Instance. You'll see this information:

Copy the IP to the clipboard
Install/Open Putty
NOTE: If you're using a Windows machine to connect to the OCI instance, you must use a tool like PuTTYgen to convert the private key file to a format that PuTTY can use.
Paste in the IP address in to Host Name (or IP address)
**Connection>SSH>AUTH>Private key>**Select the Private Key
On Session, Enter Jenkins_0 to Saved Sessions and click Save
Double Click the Jenkins_0 and open a Putty session
Username is opc
Install Java (5mins)
sudo yum install java-11-openjdk -yAdd the repo
sudo wget -O /etc/yum.repos.d/jenkins.repo https://pkg.jenkins.io/redhat-stable/jenkins.repoImport the 2023 key (you'll need to find the right key for future releases)
sudo rpm --import https://pkg.jenkins.io/debian-stable/jenkins.io-2023.keyInstall Jenkins
sudo yum install jenkins -yEnable & Start Jenkins
sudo systemctl enable jenkins
sudo systemctl start jenkins
Add firewall rules
YOURPORT=8080
PERM="--permanent"
SERV="$PERM --service=jenkins"

sudo firewall-cmd $PERM --new-service=jenkins
sudo firewall-cmd $SERV --set-short="Jenkins ports"
sudo firewall-cmd $SERV --set-description="Jenkins port exceptions"
sudo firewall-cmd $SERV --add-port=$YOURPORT/tcp
sudo firewall-cmd $PERM --add-service=jenkins
sudo firewall-cmd --zone=public --add-service=http --permanent
sudo firewall-cmd --reload
Check in the browser
http://<your_ip_address>:8080Make a coffee

Now it should be ready

In Putty, fetch the admin password by typing
sudo cat /var/lib/jenkins/secrets/initialAdminPasswordEnter the password into the browser
Install Suggested Plugins
Follow the steps to Create First Admin User
ENJOY!


