Caddy Server is an easy-to-use web server, lightning fast and easy to configure.
What can it do?
Here are 3 things it can do
Automatic HTTPS Encryption:
Caddy simplifies the process of enabling HTTPS for your websites. It automatically obtains and manages SSL/TLS certificates using Let's Encrypt, ensuring secure and encrypted connections without the hassle of manual certificate management.
Reverse Proxying:
You can use Caddy as a reverse proxy to route incoming requests to backend web applications or services. It provides easy-to-configure reverse proxy capabilities, making it a great choice for load balancing, API gateways, and securely exposing internal services.
Static File Serving:
Caddy can serve static files and websites with ease. It includes features like automatic index file generation, support for HTTP/2, and efficient file compression. This makes it suitable for hosting static websites and web applications.
I do Oracle, what can it do for me?
Basically, with a custom domain, or set of subdomains, you can acess all your kit. A 23c DB, an APEX instance, an ORDS API, a WordPress site, a Node.js Server... ok, you get the idea... anything on your VNIC from your Custom Domain.
I also like it can do HTTPS to HTTP with let's encrypt certifications auto-generated and auto-updated. You
Basically, write on the config file, and caddy does the rest.
This Guide
This guide will use the local installation of Caddy. I had too many issues with a rooted/rootless Docker container with reserved ports, even after attempts to circumvent these blocks. For now, it appears a local install is best. Caddy can run nicely in the background too
This tutorial outputs a simple message although, please see the section called "Caddyfile examples" for accessing typical Oracle OCI services. I'll keep this section updated.
Open the Ports
Bash/Terminal into your machine
Configure your Firewall
 YOURPORT=2019
 PERM="--permanent"
 SERV="$PERM --service=https"

 sudo firewall-cmd $PERM --new-service=caddys_port
 sudo firewall-cmd $SERV --set-short="caddy_port ports"
 sudo firewall-cmd $SERV --set-description="caddy_port port exceptions"
 sudo firewall-cmd $SERV --add-port=$YOURPORT/tcp
 sudo firewall-cmd $PERM --add-service=caddys_port
 sudo firewall-cmd --zone=public --add-service=caddys_port --permanent

 sudo firewall-cmd --permanent --zone=public --add-service=http
 sudo firewall-cmd --permanent --zone=public --add-service=https

 sudo firewall-cmd --reload
In your Compute Instance, Right-click the VCN hyperlink and open the link in a new tab

Click on Security Lists
Click on Default Security List
Click Add Ingress Rule for a CIDR of 0.0.0.0/0 and a port of 80. See picture below.

Click Add Ingress Rule at the bottom
Repeat the steps for ports 443 & 2019.
Configure DNS
Point a sub/domain to your Unix box. Here I have an A subdomain called micro pointing at the IP address of my box

Install Caddy locally
Type the following
 sudo dnf install 'dnf-command(copr)' -y
 sudo dnf copr enable @caddy/caddy -y
 sudo dnf install caddy -y
Elevate ports
sudo setcap cap_net_bind_service=+ep $(which caddy)
Configure a Caddyfile
Type the following
nano CaddyfilePaste in the following. For example, im adding my subdomain of micro.example.com or you can just add example.com for the whole domain.
 micro.example.com {
          respond "hello, im Caddy"
  }
CTRL+X to Save the file
Run Caddy
Test caddy by running
sudo caddy run
or, once you are happy with how you've configured the Caddyfile, you can start it in the background
sudo caddy start
# to stop it, just type..
# sudo caddy stop
Test it out

Not Working? see the troubleshooting section.
Example Caddyfiles
Output plain text
 micro.example.io {
         respond "SNES > GENESIS"
 }
Reverse Proxy to a Docker Container on port 8080
  micro.example.io {
         reverse_proxy localhost:8080
 }
Access APEX on Autonomous DB
 micro.example.io {
         # TODO
 }
Troubleshooting
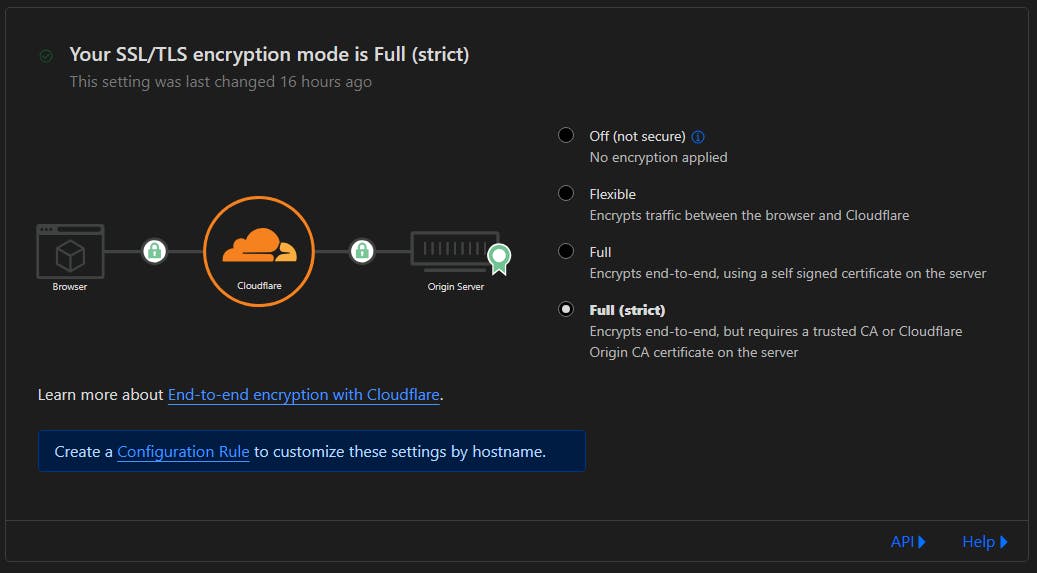
To stop too many redirects On Cloudflare To change your encryption mode in the dashboard:
Log in to the Cloudflare dashboard and select your account and domain.
Go to SSL/TLS.
Choose encryption mode FULL (strict)


